Feature Flags are used to control Mobile POS features from LS Central. Feature Flags can be set for Company, Store, POS Terminal, or any combination of those.
Feature Flags can be inserted manually or automatically by running the Insert Default Data function in Retail Setup.
To manually insert Feature Flags
- Navigate to LS Retail - Point Of Sale - POS - General - Feature Flags.
- On the Feature Flags Setup page, in the Feature Flag field, drill down and click Advanced.
-
Click the New action, and fill in the Code and Description fields:
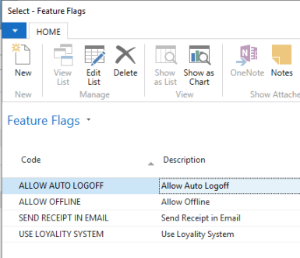
- Click OK.
-
Back on the Feature Flags Setup page, the Value field, which is a text field used to control the Mobile POS and is predefined by the Mobile POS, now displays the appropriate value from the Mobile POS:
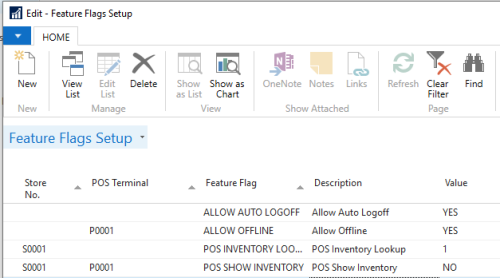
The Feature Flags values are mostly Boolean values, that is True/Flase (Yes/No). This means that if a flag is to be displayed on the Mobile POS, the value in the Value field must be Yes.
Note: The Value field is a free format text field, so the field can hold any form of text, numerical or alphabetical.
To automatically insert Feature Flags
- Navigate to the Retail Setup page, and click the Insert Default Data action.
-
Select the Feature Flags check box in the Selection list.
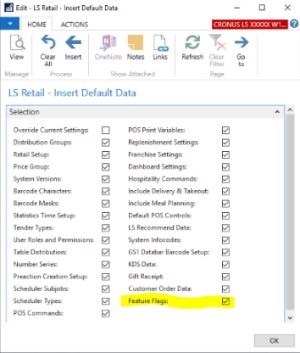
Tip: If you only want to insert Feature Flags, you can click the Clear All action. Select the Override Current Settings and the Feature Flags check boxes. Then click the Insert action to populate base features to the Feature Flags table.
-
On the Feature Flags Setup page, the Value field, which is a text field that is used to control the Mobile POS and is predefined by the Mobile POS, now displays the appropriate value from the Mobile POS: