The printer type and device name is selected in the Printer FastTab on the Hardware Profile Card.
WinPrinter
The LS Central WinPrinter prints to a Windows printer, however it will not use a Report to do it. The Print Data (Print Buffer) is sent to the POS Control (Add-in) that will print directly to the printer using Windows API.
The benefit from this is that printing to a Windows printer can now take place on the POS (client side) and will not require a Report to be run. Another benefit is when printing is needed in Web Service functions (from Mobile Devices for example), then printing will be executed without any UI Interaction.
Another benefit is that the new Window Printing Class can print directly to a Bitmap that can then be exported to a disk or accessed in memory for other use in C/AL code.
Configuring a WinPrinter (POS Printer Setup)
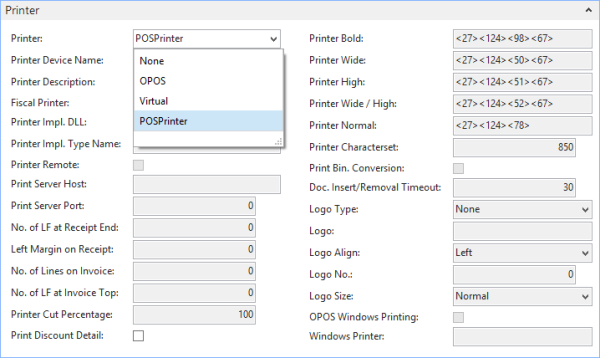
The POS Printer setup is used to configure a WinPrinter. Note: The Printer fields of the Hardware Profile table do not have this option.
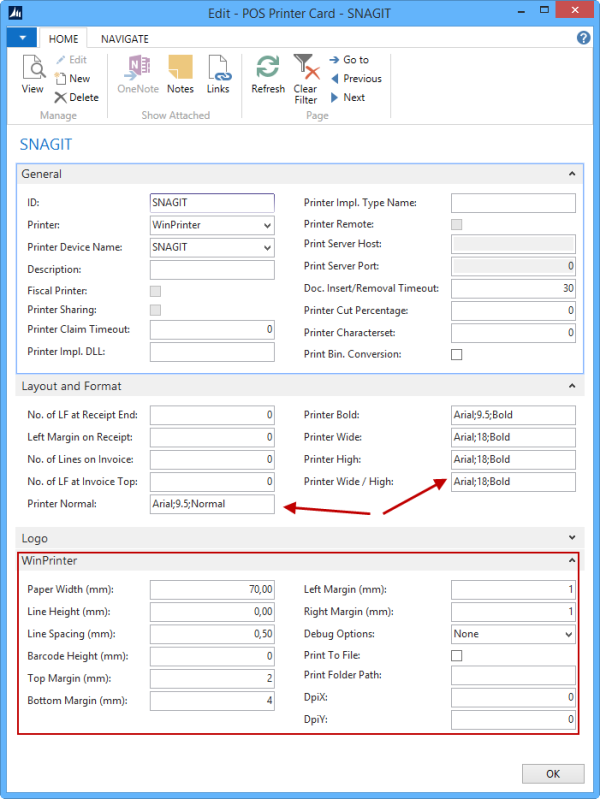
The WinPrinter uses the font fields unlike an OPOS Printer. Instead of containing ESC/POS commands in the Layout and Format FastTab, it will contain a description of the Windows font to use. The format of the font description is [NAME];[SIZE];[STYLE] where NAME can be any Windows font (e.g. Arial, Calibri etc.), SIZE is the size of the font in points and STYLE can be any of the standard font styles (Normal, Bold, Italic, Strikeout, and Underline).
Other fields specific to the WinPrinter are grouped into a separate FastTab. All the measurement fields (Margins, Width, Height and Spacing) are in millimeters.
The Debug Options field can be used to show the design text of the printout. The design text is usually a string of up to 40 characters that can accompany each printed line and will control the layout of the line. This way, a line can be split into sections with different alignment and formatting. Each section is a string of hash signs with a special control character as the second character. #L######, for example, means that a string of 8 characters should be aligned left at this position. Sections are separated by spaces. The design strings are only configurable in C/AL code in the POS Print Utility codeunit.
If the Print to File field is selected, the printout will not be sent to the printer, but instead to a Bitmap that can then be accessed or written directly to disk (if the Print Folder Path is not empty). The image quality can also be configured with the DpiX and DpiY fields (Dots per Inch).
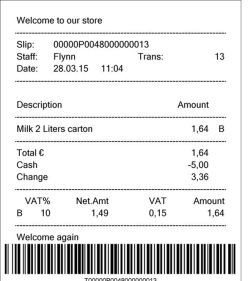
Barcode Printing
The WinPrinter supports printing barcodes to a certain point. The following symbologies have been tested when printing receipt barcodes, Code128 and Code39. The Code128/Code128_A is the recommended symbology to use as it seems to take up less space (width) on the printed bitmap. Note: The resolution of the Bitmap/Printer will have a say in the quality of the barcode and might cause it not to be readable by certain scanners.
WinPrint Use Cases
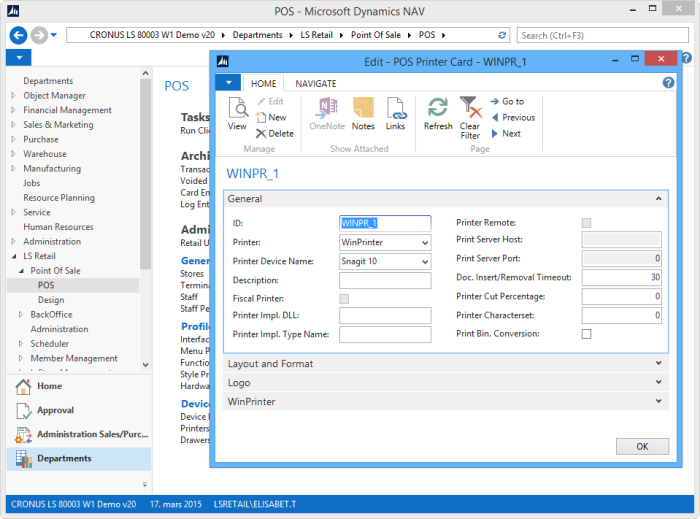
Configuring a WinPrinter:
- Open the Printers page to create a new Printer.
- Give it the name WINPR_1 and select the WinPrinter type.
- Finally, select the Windows Printer to use in the Printer Device Name field.
Note: You can use a part of printer name and the best match will be used.
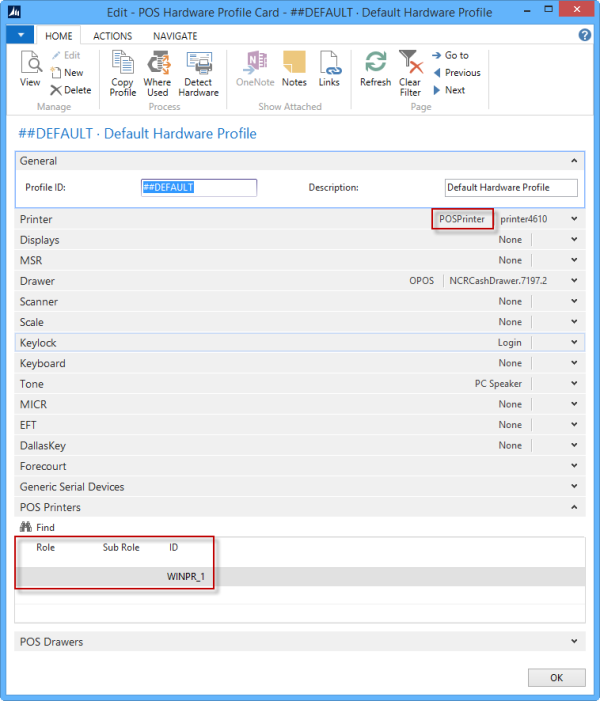
To use this printer as the main POS Printer you need to make 2 changes to the Hardware Profile in use:
- Select the new “POS Printer” type in the Printer field. This new option tells the POS that the printers to use are all defined in the POS Printer table and linked to the Hardware Profile in the POS Printers section of the Hardware Profile.
-
Link the WINPR_1 Printer to the Hardware Profile (for all Print Jobs). To do this, create a new line in the POS Printers FastTab in the hardware profile, leave the Job and Sub-Job fields empty, and select the WINPR_1 printer in the ID field.
Using the WinPrinter as “External Printer” (for handhelds):
Printing from the Mobile POS is done through calls to Web Service functions. The default setup of which printer to use is done on the POS Terminal Card.
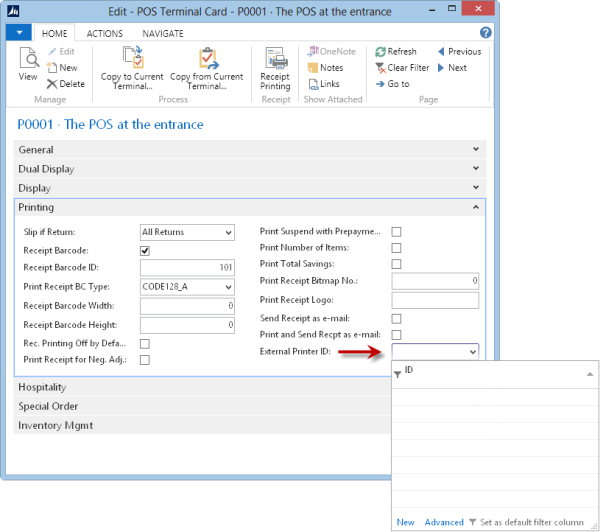
Here you can select and create (with Advanced link) POS External Printers:
- Use the Advanced link to create a new POS External Printer record.
-
Give the new record an ID, and in the POS Printer ID column select a printer from the POS Printers list.
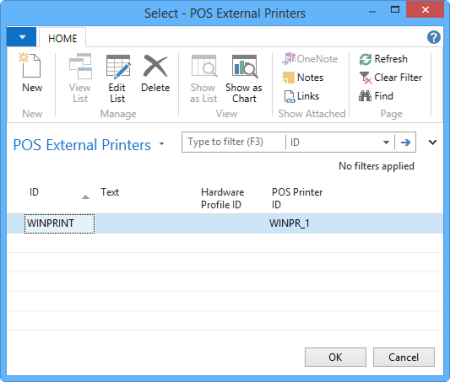
- Finally, click OK to select the POS External Printer as the external printer for this POS Terminal.